How to Make a Loom in Minecraft? Easy and Best Methods 2025

In Minecraft, players create things and structures while they navigate the virtual spaces and develop methods for enduring in the environment. Users have access to numerous items, including available construction materials alongside blocks.
The Loom in Minecraft represents a particular box designed to generate banner designs. You can extract a Loom using your hand, as any tool would suffice. Banners receive their improved look through the assistance of these Loom devices.
The following piece demonstrates how to produce a Loom in Minecraft by following a basic step-by-step approach. The Loom needs proper utilization along with its creation process.
How to Craft a Loom in Survival Mode?
1. Open the Crafting Menu
The first step is to open your crafting table to create the 3×3 crafting grid.
2. Add Items to make a Loom
The crafting menu contains a 3×3 crafting grid structure for the crafting area. The necessary materials for building a loom include placing two string elements along with two wood planks within the 3×3 crafting grid.
One can create wood plank products using oak, spruce, birch, jungle, acacia, dark oak, mangrove, bamboo, crimson, warped or cherry planks. The selected wooden materials for our loom-making procedure are oak planks.
The loom manufacturing process requires that the string must be laid correctly alongside the wood planks according to the shown pattern. The placement of crafting materials for a loom requires a single string in the first box, along with a single string in the second box of the first row. Two boxes in the second row should contain one wood plank each.
The Minecraft recipe for building a loom starts from this specific placement. Your finished pattern within the crafting area will present the Loom inside the corresponding box to the right.
3. Move the Loom to Inventory
A successful loom creation requires you to transfer the newly made item into your inventory.
Loom in Minecraft
Playing Minecraft gives users access to the Loom as an essential utility block for creating bespoke banner designs. The Loom enables a more efficient pattern application for banners than the crafting table because users need to input each design with one Dye only.
Villages with Shepherd inhabitants make regular use of the looming block, and the block facilitates item trade, especially for banners as well as wool and carpets. The Loom enables quick and energy-efficient customization of banners that support both team decorations and castle embellishments.
Materials Required for Loom in Minecraft
You can easily gather the necessary resources, which amount to 2 wooden planks and two strings, to manufacture the Minecraft loom:
2 Wooden Planks: Any type, such as Oak, Birch, or Spruce.
2 Strings: Defeat spiders to obtain strings or fish for them and collect cobwebs through looting or fishing.
Set the strings in the top row and wooden planks below them on a crafting table after gathering all materials.
How to Use Loom in Minecraft?
Using a loom is straightforward, follow these steps to learn using loom.
1. Click right-click to open the Loom by placing it in your world.
2. Users should begin by adding their banner to slot one while placing their Dye in slot two. They should also have the optional banner pattern in slot three.
3. Select one of the designs that will display on the right side of the screen.
4. Save your modified banner design to your inventory after it becomes ready.
Set the strings in the top row and wooden planks below them on a crafting table after gathering all materials.
Types of Banner Designs Available in the Minecraft
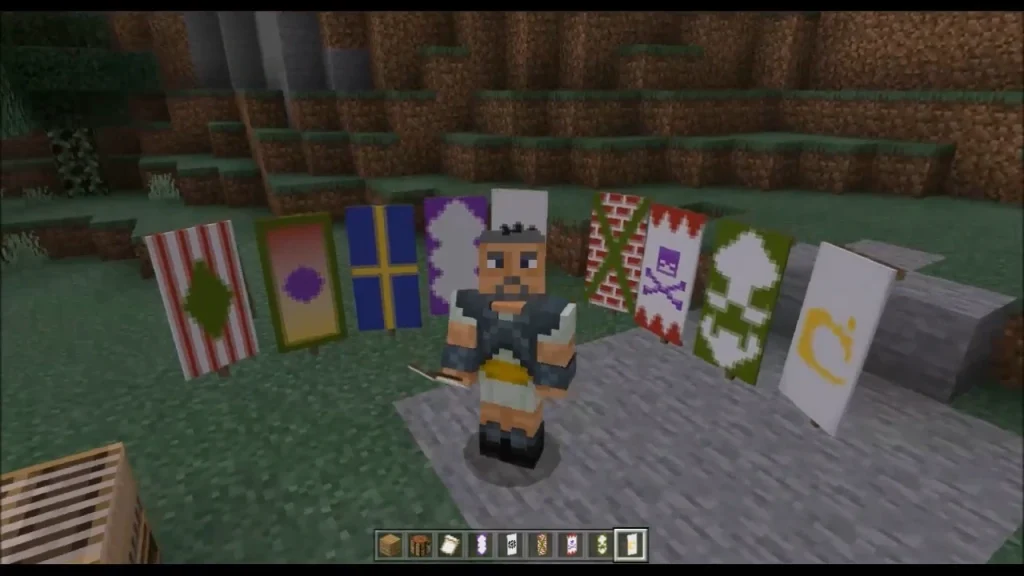
Banner designs represent Minecraft’s most creative feature, and Loom provides streamlined access to their application. The following list showcases the regular banner patterns that Minecraft players create frequently:
1. Creeper Face
The Creeper Face design enables you to insert the distinctive Creeper facial image onto your banner. The banner pattern becomes an ideal choice when you want to add mob-related visual elements to your base structures or your flags. The standard item you need for this application is the Creeper Charge banner pattern.
2. Skull Pattern
The Skull banner pattern becomes your best choice when you desire either a frightening or pirate-styled aesthetic. The Skull Charge pattern generates a bone-shaped image known as a skull-and-crossbones design.
3. Gradient Banner
Banner designs that use gradients enable a professional fading transition that results in a smooth and stylish appearance. The pattern you use depends mainly on which type of dye material you have chosen.
4. Cross Banner
The pattern design produces either a substantial cross (+) or an X structure throughout your banner. Many clans and teams choose this pattern to design their team flags because it represents a bold, symmetrical composition.
5. Shapes and Symbols
Three primary patterns that can be used are diamonds and circles alongside different geometric shapes. Such patterns help users transform their banners with different visual styles.
6. Letters and Numbers
Within Minecraft, players use existing image patterns to create simulated textual representations of initials or numbers for banners.
7. Stripes
Vertical, horizontal, and diagonal stripes create simple and traditional banner designs. Multiple layers of these patterns are utilized to develop detailed presentations.
8. Border Banner
The element outlines the banner through a thick-colored border. As a concluding element, it draws attention to the banner’s dominant composition.
Players can utilize banner types for individual creative expression across their Minecraft world design, particularly when establishing bases or castles, shields, and team flags.
Also read: Best Minecraft Launchers
Where to Find Looms?
Natural loom occurrences in Minecraft appear inside shepherd houses that were built inside villages. The structures contain wool and wood materials, and shepherd villagers set up their blocks for work.
Breaking a loom is possible by using any tool, yet an axe provides the fastest method of obtaining it while allowing you to relocate the item. Two wooden planks together with two strings can be used to create a basic loom if village searches yield no results.
Loom Block Properties
• Stackable: Yes (Max 64)
• Tool to Break Faster: Axe
• Fuel Source: Yes (burns for 15 seconds in a furnace)
• Hardness: 2.5
• Blast Resistance: 2.5
• Flammable: Yes (burns like wood)
Pros and Cons of Loom in Minecraft
Among all Minecraft blocks, the Loom presents both positive and negative attributes in its design.
Conclusion
The Loom works as an efficient solution for designing and enhancing banners. Banners have become available through this tool, which offers rapid and easy design capabilities. Villagers who belong to the shepherd class have the responsibility to produce looms.
The villagers thus use these resources to trade valuable items with their community. A Loom in Minecraft MOD APK has a basic and simple fabrication process. The tool allows banner designs through its usage. The tool lacks simplicity when trying to create complex banner patterns.
FAQs
What materials do I need to craft a loom in Minecraft?
To craft a loom, you need 2 wooden planks (any type) and 2 string. The wooden planks can come from any wood (oak, birch, spruce, etc.), and string can be obtained from spiders or cobwebs.
Where can I find a loom if I don’t want to craft one?
Looms can be found in villages, specifically in shepherd houses. You can break and collect them using any tool (or even bare hands).
What is the loom used for in Minecraft?
A loom is used to create banners with patterns and designs. It allows you to combine a banner, a dye, and optionally a banner pattern item to apply custom designs more easily than with a crafting table.
Do I need a loom to make banners in Minecraft?
Technically, you can still use a crafting table to make basic banner designs, but a loom simplifies the process and provides more design options, especially when using banner pattern items for special symbols like the creeper face or skull.