Village in Minecraft: How to Find, Build & Trade with Villagers
Village in Minecraft is the one to look out for since they offer you safety, supplies, and a chance to sell and buy items. They’re more meaningful than a group of structures; they serve as spots where we scavenge and protect ourselves. Finding out about them is often not simple. If you need to locate a village to survive or are searching for a project, this guide will show you the best ways.

Types of Villages in Minecraft
Each biome produces its own unique style of Minecraft villages. Plains, deserts, savannas, taigas, and snowy tundras are the five kinds of villages. Besides the differences in people, every type is known for its architectural style and the materials that villagers produce. Spotting the differences between villages on the horizon helps you choose the best one and know what you’ll get from each.
Best Biomes to Find Village in Minecraft
Villages can be found only in a few specific types of biomes. we will look at the best biomes for discovering villages and what they offer.
1. Plains Biome
Many of the villages in Minecraft appear most often in plains biomes. Since the land is flat, fields wide, and grass plentiful, buildings and villagers are visible from far away. You can expect many ordinary wooden houses, farms, and, occasionally, iron golems to wander near you.
2. Desert Biome
The villages in deserts are special due to their sandstone structures and nearby cacti. Surrounding these areas are desert temples and they provide distinctive loot. There is little vegetation and water which can make visiting these villages challenging, yet it’s worth it because of the strong commercial options.
3. Savanna Biome
There are plenty of acacia wood buildings and orange landscapes in savanna villages. The special shape of their buildings and the flat ground nearby make it simple to locate them. Most of them are built next to plains or deserts, which makes them convenient for people to visit.
4. Taiga Biome
Spruce wood is used in construction in these villages, giving them a simple woodland feel. It can be tough to spot these villages because they are close to the trees and nearby foliage. They also contain plenty of wood and tend to be connected to larger farms.
5. Snowy Tundra
Villages in snowy tundra are topped with snow and constructed from snow and spruce wood. The icy environment around them makes it more difficult to get there, but you’ll find different scenery and one-of-a-kind trades.
Best Ways to Find a Village in Minecraft
You can easily find villages in Minecraft, regardless of your experience with the game. We’re ready to look at the best ways to find these prized settlements.
1. Explore Common Biomes
You can simply explore plains, deserts, savannas, taigas, and tundras to maximize your survival. Borders of the village can be identified by pathways, lamp posts, or bunches of buildings.
2. Use a Map Seed with Known Village Coordinates
There are a lot of players who create Minecraft seeds that will place you close to or in a village. You can look for these seeds on the internet, and simply entering the coordinates will let you find a village you don’t have to search for.
3. Use a Cartographer’s Map
Cartographers in the game trade maps for exploration when you give them emeralds and paper. You’ll discover nearby villages and woodland mansions by looking at these maps.
4. Travel Faster with a Horse or Elytra
Walking at a pace can slow down all your movements. If you want to go fast on the ground, use a horse and glide over large areas for greater distances using an elytra. With this, you can move around and learn more places in less time.
Benefits of having a village in the Minecraft
It’s not only neighborhoods that look great; they also give useful bonuses that help make your campaign better. Let’s look at why you should try setting up a Minecraft village.
1. Trading Options
Emeralds are worth trading with the villagers for items they sell. Giving traders crops, coal, or some materials may get you enchanted books, tools, or armor.
2. Resources
Beds, crafting tables, furnaces, and crop farms in villages mean you don’t waste time creating your basic base.
3. Food Supply
Since there is abundant wheat, carrots, potatoes, and beetroot, village folk can enjoy fresh, renewable foods.
4. Safe Spawn Location
When starting out, villages can offer you shelter and guardian iron golems, so they are a nice spot to set your camp.
5. Loot and Chests
Most village houses contain chests filled with emeralds, interesting books, bread, and other supplies. It helps your economy a lot at the start of the game.
Alternative methods to find village
There are several ways you can choose to find a village that has been successful. Let’s take a look at the top techniques for success.
1. Exploring Manually
This approach has been used traditionally for many years. Choose one direction and proceed since village markers include paths, lamp posts, and groups of houses.
2. Using a Seed with Known Village Coordinates
The community’s shared seeds give players a quick way to start a village. Put in the coordinates and guide yourself directly to the village.
3. Utilizing Online Tools and Maps
Seed map tools on Chunkbase allow you to easily find village locations. Provide your world seed in the form to learn the exact location of the villages.
4. Flying in Creative Mode
While using Creative Mode, choose a high place to search for villages. Using this method makes construction projects go more quickly and efficiently.
What to do after Finding a Village
Stumbling upon a village in Minecraft can be a game changing moment. Villages are not only great for resources and shelter, but they can also become the foundation of your long term survival and development in the game.
So, what should you do after finding a village in Minecraft? Here are the five crucial steps to take.
1. Build House
Once you discover a village, your first priority should be building a house. While village homes can provide temporary shelter, having your own customized base gives you better protection and a place to store your resources safely.
Choose a spot near the village to stay close to its benefits, and start gathering wood, stone, and other materials to build a functional, secure house.
2. Protect Village
Protect your island by surrounding your village with walls, fences, and lighting so zombies cannot invade. You can also add iron golems or make your own defense structures.
Defending the villagers not only keeps your allies safe but also ensures ongoing access to their trades and resources.
3. Collect Resources
Pick up crops, gather wood, and search for loot from chests. Combine resources crafted with blowers and smithing to make something even better. Villages are gold mines for early-game players. After securing the area:
1. Harvest crops like wheat, carrots, and potatoes.
2. Loot chests in village homes and blacksmith shops.
3. Use villagers’ crafting stations like the smithing table or loom in Minecraft.
These resources can give you a solid boost, especially if you’re starting a survival world.
4. Trading
Pick up crops, gather wood, and search for loot from chests. Combine resources crafted with blowers and smithing to make something even better.
This is my one of the best features of villages is trading with villagers. Each villager has a profession like farmer, librarian, or armorer and offers unique trades. You can exchange emeralds, crops, or crafted items for valuable goods such as enchanted books, tools, and armor.
Level up villagers by trading regularly to unlock better items, and consider curing zombie villagers to get discounts.
5. Expand the Village
Expanding a village in Minecraft is a great way to turn a small settlement into a thriving, productive community. Start by building additional houses near the original village structures. Every new house should have a bed inside, as beds are essential for villagers to claim a home and reproduce. Keep the village well-lit and safe from hostile mobs to encourage growth.
Next, breed villagers to increase the population. This requires providing at least three beds (one for each parent and one for the baby) and enough food like bread, carrots, or potatoes. Villagers will only breed if they are “willing,” which means they need to have enough food in their inventory. More villagers mean more potential for new professions and better trades.
Finally, assign new workstations to guide villagers into different professions such as librarian, farmer, or toolsmith. Place the appropriate job site blocks (like a composter for a farmer or lectern for a librarian) near beds to help new villagers choose a profession. As your village grows, it becomes more useful for trading, farming, and even defense with the help of Iron Golems.
Advanced Tips and Tricks
Finding a village in Minecraft can unlock valuable resources, trading opportunities, and even new gameplay mechanics. Whether you are a survival player or a builder, locating a village early can give you a big advantage in your world.
1. Fast Travel Between Villages
Once you have found multiple villages, fast travel can save time and boost efficiency. Use horses with saddles or Elytra wings (once acquired) to glide between distant locations. Boats on ice roads are another speedy method in snowy biomes.
Setting up a rail system with minecarts is also an excellent option. Though resource-intensive, it’s reliable and can be automated. Use powered rails for faster travel and stations near village entrances for easy access.
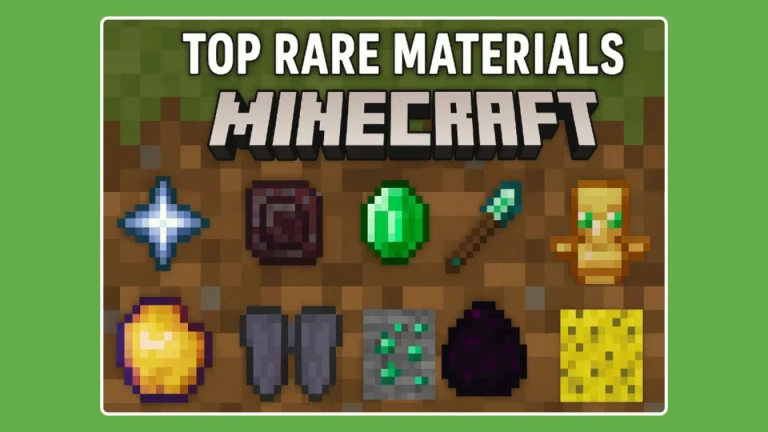
Also read: Rare Materials in Minecraft
2. Linking Villages with Nether Portals
Nether travel is the ultimate time saver. One block in the Nether equals eight in the Overworld, making it perfect for linking villages across long distances. First, build a Nether portal in one village, then another at your desired destination.
Be precise with your coordinates to ensure the portals connect properly. Use tools like chunkbase.com or in game F3 coordinates to calculate locations. This method dramatically reduces travel time and helps with easy village access.
3. Breeding Villagers for Growth
To grow your village, encourage villager breeding. Ensure each villager has a bed, job site block, and enough food. Carrots, bread, or potatoes work best when tossed near them. You’ll also need enough unclaimed beds to support baby villagers.
Fenced in areas with security from zombies and pillagers help protect your growing population. A well managed breeding system boosts trading options, iron farm efficiency, and general village sustainability.
Pros and Cons
A manual search for resources can be exciting, but it takes a long time and has no specific results. Seeds or using online maps will give you a definite location, but you miss the fun of exploring. Creative flight is a quick method for builders, even if it’s not for everyone’s survival. While cartographer maps add difficulty to the game, they must first be made and traded.
Final Thoughts
In Minecraft, villages provide valuable resources, a safe environment, and a friendly feeling. No matter how you look, the seeds you buy, or the maps that come with the game, discovering a village will make your experience different. When you secure your village, use your resources to improve it, and you will get rewards for food, trade, and safety in Minecraft.
FAQs
How do I quickly find a village in Minecraft?
Explore plains, savannas, deserts, taigas, and snowy tundra biomes. Using a seed map tool like Chunkbase can also help you locate nearby villages faster.
Can villages be found in all Minecraft biomes?
No, villages only spawn in specific biomes like plains, desert, savanna, taiga, and snowy tundra. They do not generate in jungle, swamp, or mountain biomes.
What is the fastest way to travel between villages?
Using Nether portals is the fastest method 1 block in the Nether equals 8 blocks in the Overworld. Alternatively, minecart rails or boats on ice roads work well too.


